如何在 CentOS 7 上成功安装并运行 APISIX 服务,本教程将依据 APISIX 官方文档,将带你从零搭建 APISIX 服务。
如何快速安装 APISIX
依赖安装
1、etcd 安装
# 下载 etcd 安装包
$ wget https://github.com/etcd-io/etcd/releases/download/v3.4.13/etcd-v3.4.13-linux-amd64.tar.gz

# 解压安装
$ tar -xvf etcd-v3.4.13-linux-amd64.tar.gz && \
    cd etcd-v3.4.13-linux-amd64 && \
    sudo cp -a etcd etcdctl /usr/bin/

# 开启 etcd 服务
$ nohup etcd &
注意:Apache APISIX 从 v2.0 开始不再支持 etcd v2 协议,并且 etcd 最低支持版本为 v3.4.0
2、OpenResty 和 curl 安装
# 添加 OpenResty 源
$ sudo yum install yum-utils
$ sudo yum-config-manager --add-repo https://openresty.org/package/centos/openresty.repo

# 安装 OpenResty 和 curl
$ sudo yum install -y openresty curl

# OpenResty 安装好后,默认是开启的,我们需要关闭它
$ openresty -s stop
OpenResty 最低支持版本为 1.15.8.1 。
安装 APISIX
1、安装 APISIX
$ sudo yum install -y https://github.com/apache/apisix/releases/download/2.1/apisix-2.1-0.el7.noarch.rpm安装指定版本,只需要修改 APISIX 对应版本号,例如安装 2.0 版本,只需要将版本号改为 .../download/2.0/apisix-2.0-0.el7.noarch.rpm 。相应版本信息请查看APISIX 官方发布版本
2、检查 APISIX 的版本号
$ apisix version

2.1
3、启动 APISIX
$ apisix start4、查看 APISIX 启动情况

可以看到 APISIX 服务进程信息,说明启动成功。
验证 APISIX 服务
请求的简单流程图: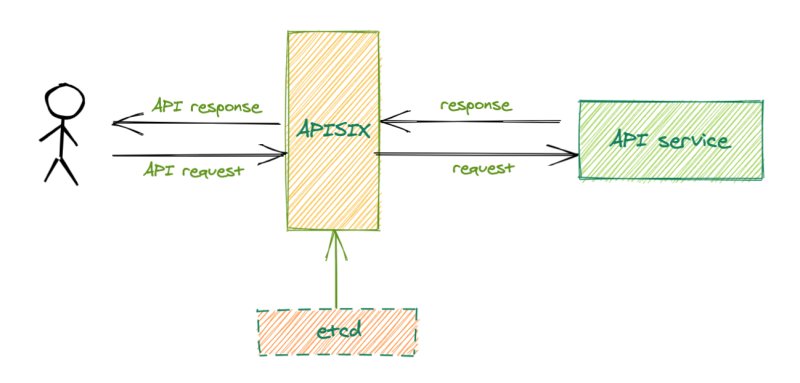
1、创建路由
这里使用 httpbin 工具模拟一个 API 服务,该服务可以回显发送到这个 API 请求数据。创建一个 id 为 1 的路由:
$ curl http://127.0.0.1:9080/apisix/admin/routes/1 -H 'X-API-KEY: edd1c9f034335f136f87ad84b625c8f1' -X PUT -d '
{
    "upstream": {
       "nodes": {
           "httpbin.org:80": 1
       },
       "type": "roundrobin"
    },
    "uri": "/get"
}'
2、测试
通过执行下面命令,返回 200 状态码及响应数据,说明 APISIX 服务能正常:
$ curl http://127.0.0.1:9080/get -i
HTTP/1.1 200 OK
Content-Type: application/json
Content-Length: 299
Connection: keep-alive
Date: Thu, 31 Dec 2020 05:19:46 GMT
Access-Control-Allow-Origin: *
Access-Control-Allow-Credentials: true
Server: APISIX/2.1

{
  "args": {},
  "headers": {
    "Accept": "*/*",
    "Host": "127.0.0.1",
    "User-Agent": "curl/7.29.0",
    "X-Amzn-Trace-Id": "Root=1-5ff14c2a-2d5f625a691b375f42afae70",
    "X-Forwarded-Host": "127.0.0.1"
  },
  "origin": "127.0.0.1, 121.41.116.83",
  "url": "http://127.0.0.1/get"
}
总结
本教程是基于 CentOS 7 快速部署 APISIX 服务,并做了一个简单的代理请求验证。更多安装方式请查看 APISIX 官方安装文档 。